


To celebrate design, craft, style and the entrepreneurial spirit, Timberland in partnership with ACL set out to highlight the guys that take matters into their own hands, to not only make great things, but to inspire and teach others the skills to do it yourself.
Wood&Faulk started as a hobby, it continued to grow as a blog and eventually it emerged as a full-fledged label. Founded by Matt Pierce in Portland, OR in 2011, Wood&Faulk now offers a full collection of interesting leather goods and operates out of an amazing shared workshop called Beam & Anchor that overlooks a massive Union Pacific switching yard next to the Williamette river.
What really propelled the line forward has been both the whimsical nature of the stuff Wood&Faulk makes and Matt’s openness about how everything is made. To this end, it began publishing the DIY process for making a lot of the stuff the brand sells on its blog and that has been an almost visceral and overwhelming response from people all over. In fact, that is how I discovered the Wood&Faulk, through its blog and I was drawn to the fact that it wasn’t trying to hide anything and it just put everything out on the table (quite literally).

The DIY idea really took hod for Matt back home in Wichita, Kansas when he was refurbishing old houses. After moving to Portland and working as a graphic designer his friends eventually began pushing him to augment his design portfolio with these DIY projects, and that was the beginning of Wood&Faulk. Taking the idea of making something both stylish and useful is interesting as a concept, but to then expand on that idea in a way to involve people further in the process makes the Wood&Faulk story especially compelling. Following Matt around for a day, you see his curiosity and DIY nature in everything around him– from the machines in his shop, to the Pendleton headliner and hand-wrapped leather steering wheel in his Land Cruiser. Much like Timberland, his interest in finely made hand-crafted leather goods permeates every aspect of his life.


Matt wears the Timberland Earthkeepers Rugged 6″ moc toe boots.


![]()
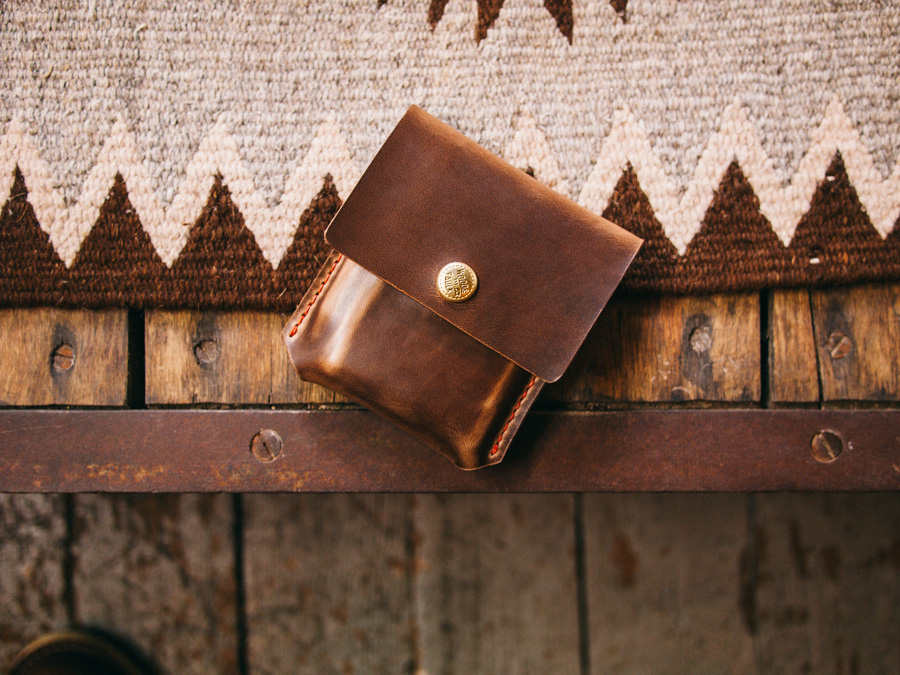
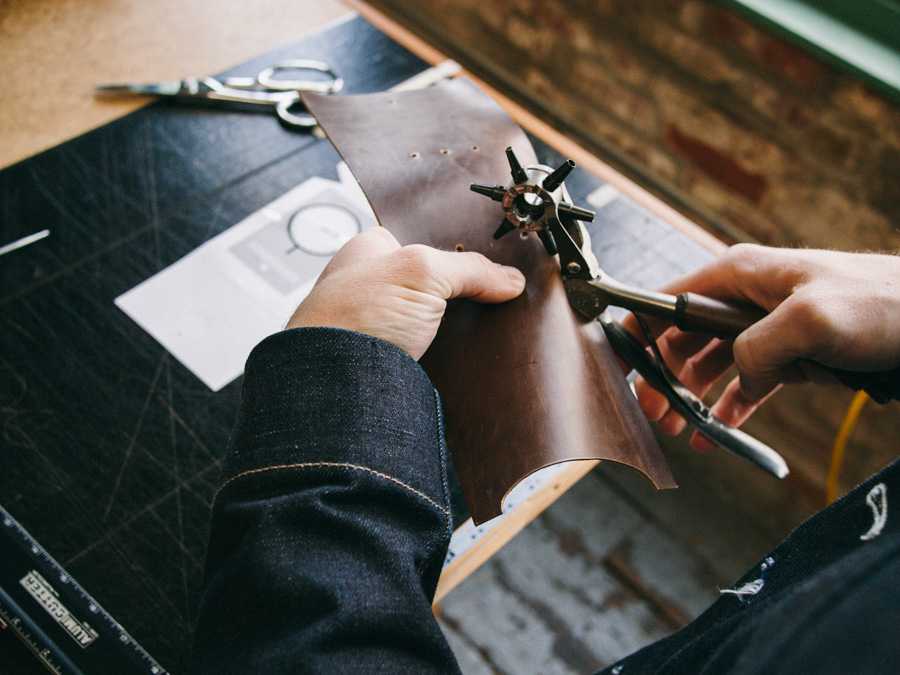
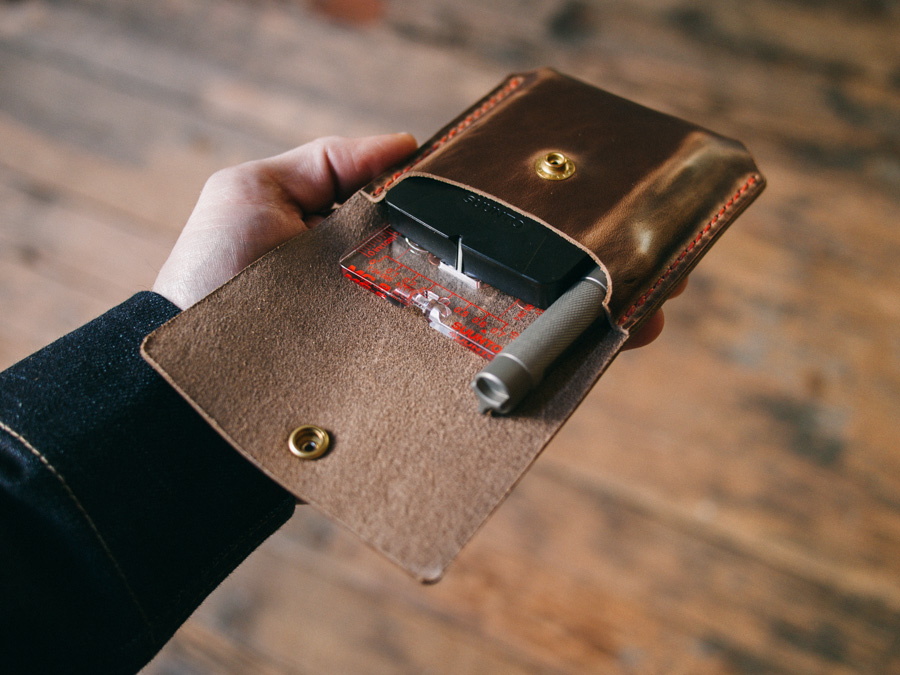
For this special DIY, Matt wanted to make a leather case to hold the compass he has been using on the canoe trips he’s been taking in Oregon. The complete guide to the Wood&Faulk DIY compass case (as seen above) from Founder and Designer Matt Pierce:
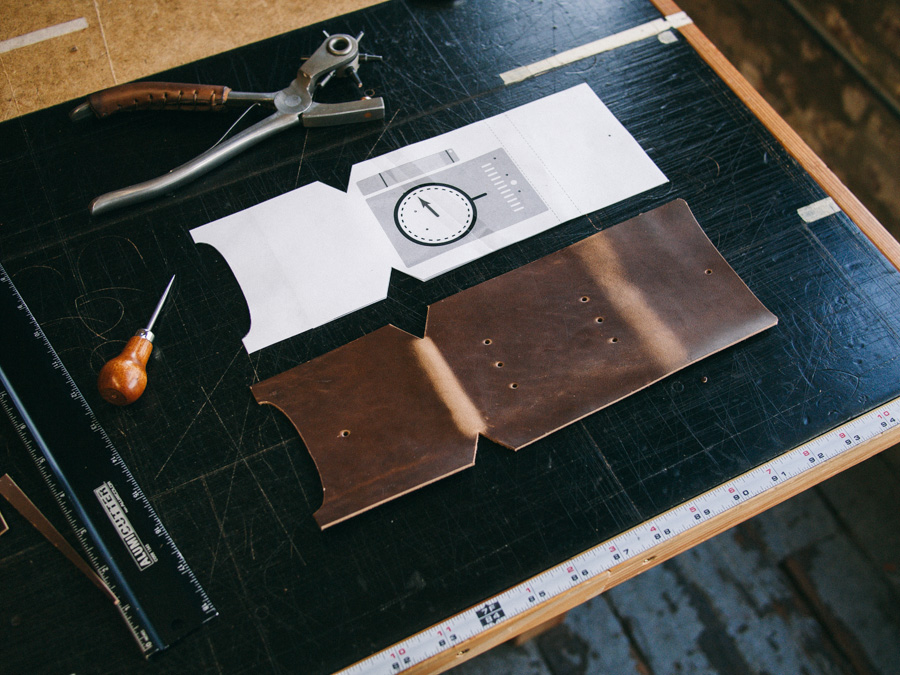
1. Start by printing out the template file (PDF) at 100%. It won’t fit on a single page, so you’ll need to select the tiling option and then add an inch of printing overlap. Tape the pieces together securely and trim them out. Find a piece of leather large enough to cut both panels from and trace them out with an awl or pencil. Be sure to mark all your inner holes indicated on the template as well.
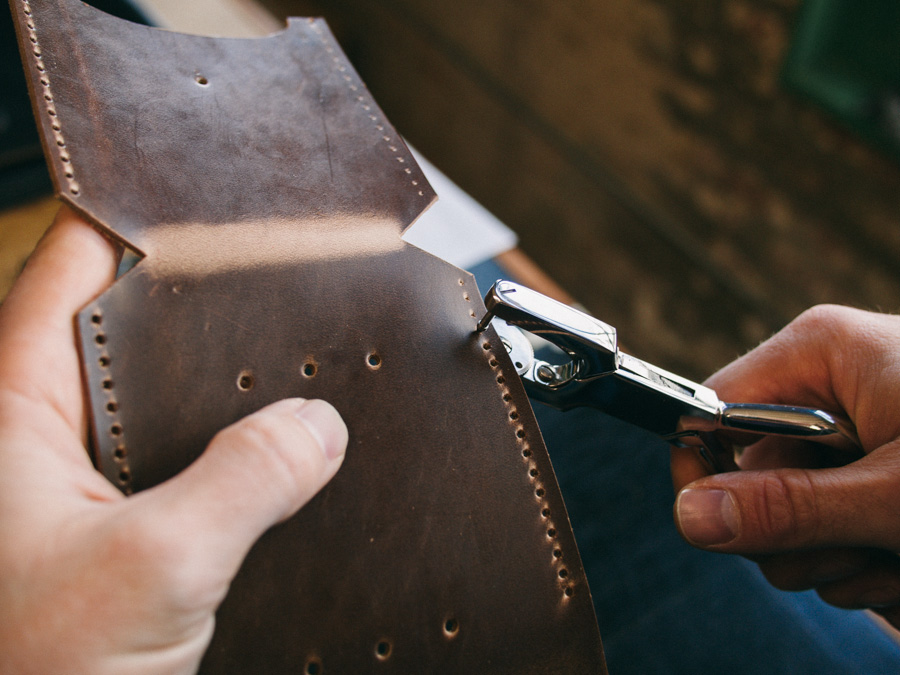
2. Cut the pieces and punch the holes for snaps and the belt loop. I’m using a #3 sized punch tube. Once your parts are cut and inner holes punched, it’s time to mark your stitch holes.
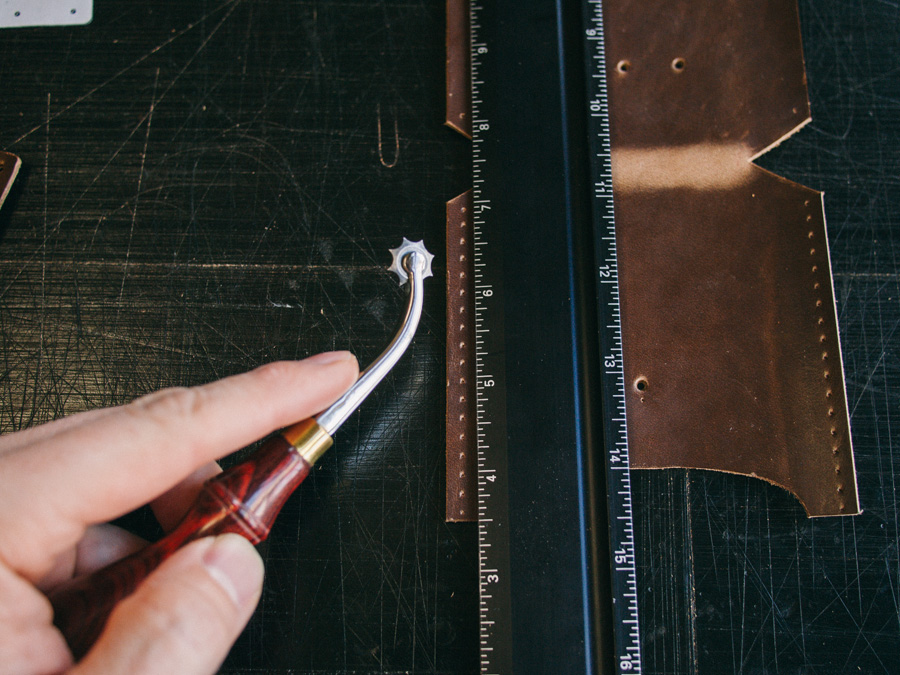
3. Using a #5 overstitch wheel and a ruler, I marked location of all the stitch holes. Make sure to start at the bottom of each size in the same place, so when folded, your stitch locations will line up.
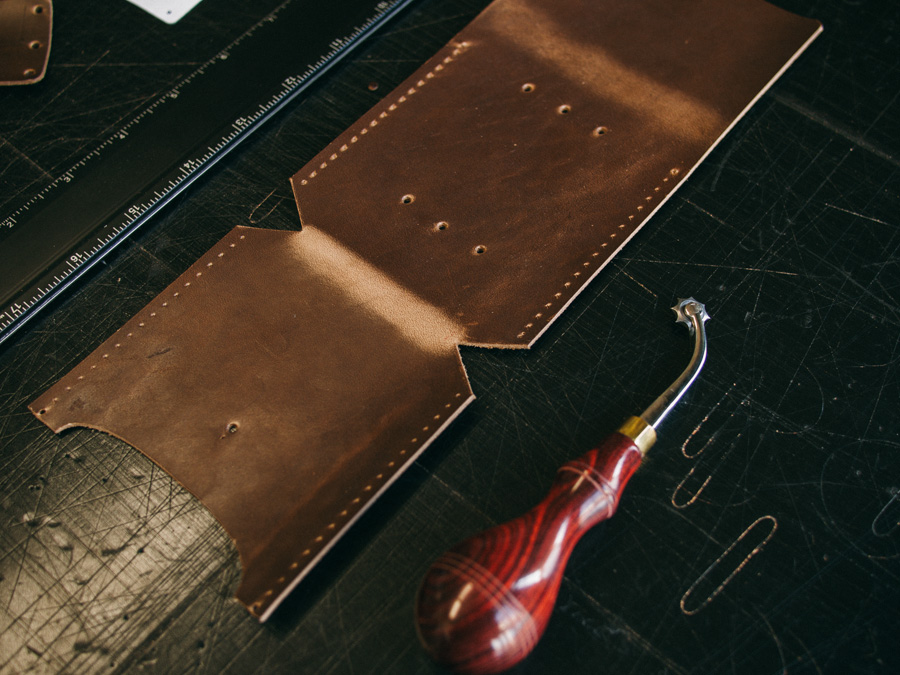
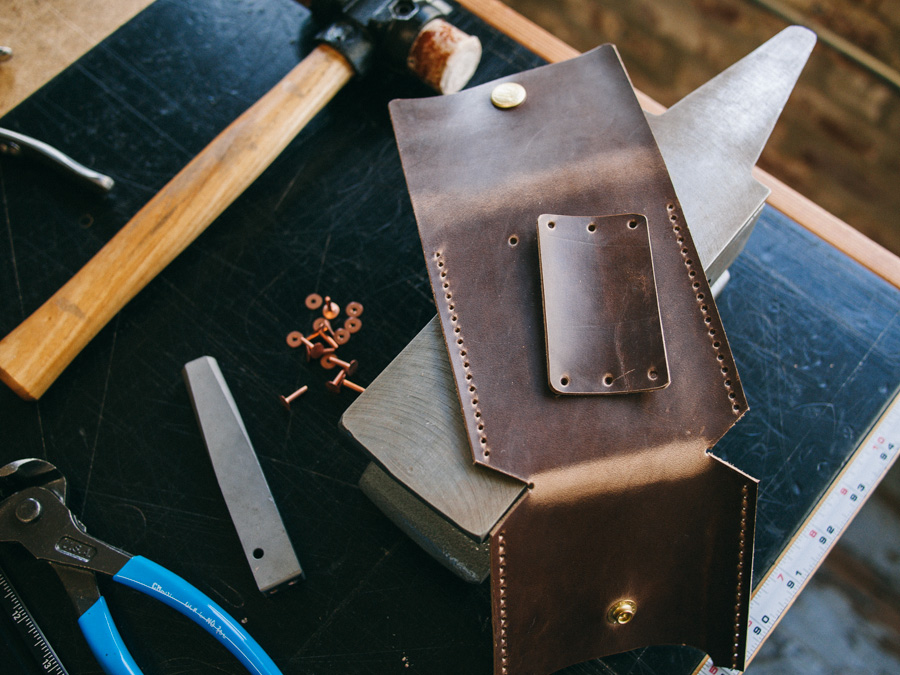
4. After marking the stitch holes, I like to punch them out instead of using an awl while stitching. It makes things a little easier and I can stitch faster this way. I’m using a hand-sewing leather punch, but you can also use regular tube style punch or even a thick awl.
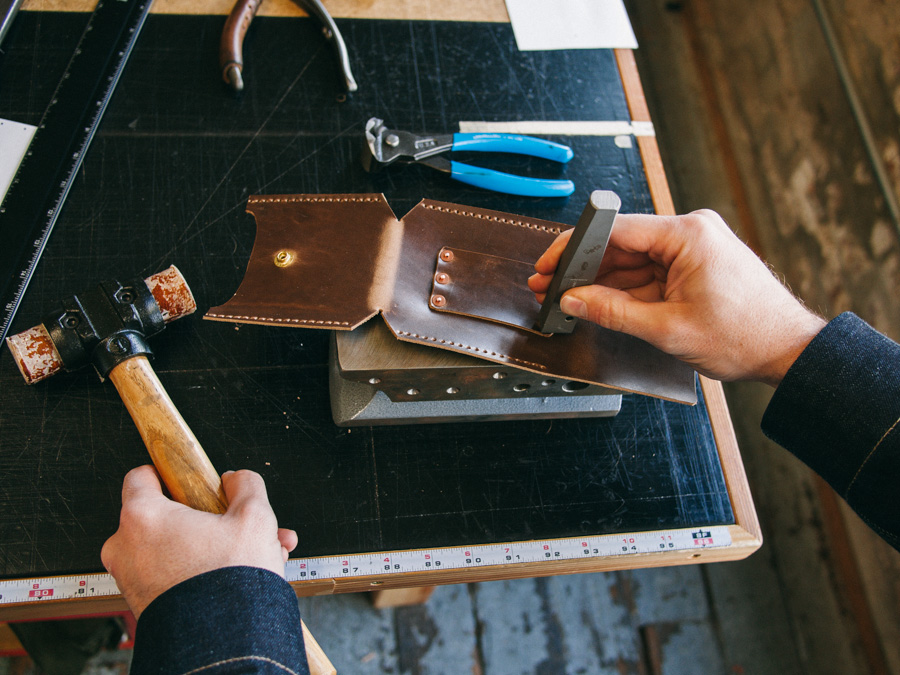
5. Once every sewing hole is punched, you’ll need to assemble all the hardware parts. Add your snaps, then using copper rivets, you can attach the belt loop.
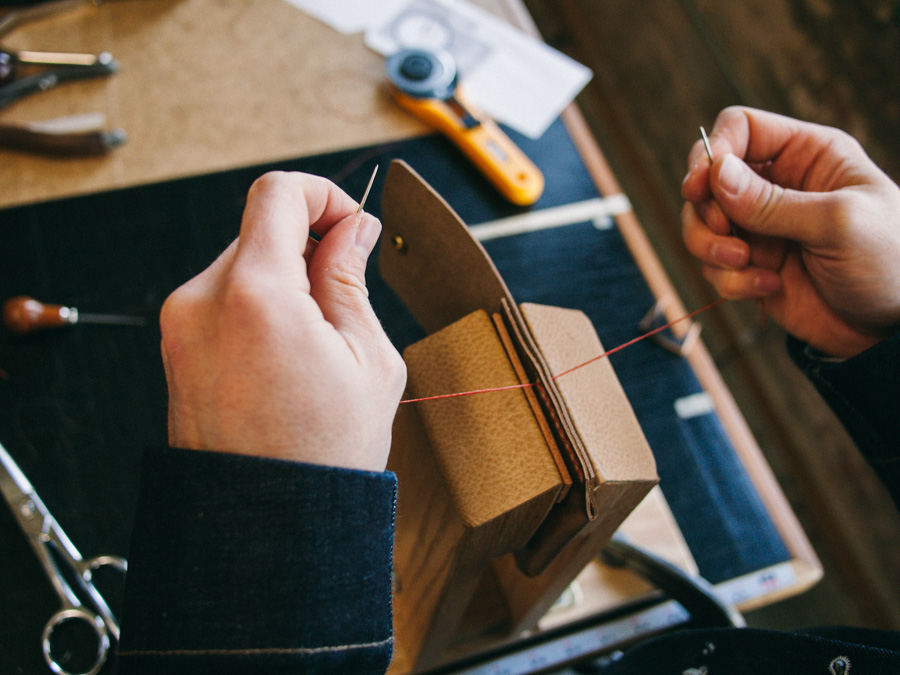
6. Now you’re ready to sew the pouch together. I’ve made some stitch ponies for the shop that we use, but you can easily purchase a simple one from leather hobby shops as well. The stitch pony will hold your pieces together securely, keep your holes lined up, and make sewing so much easier. The hand sewing method is detailed on my post here if you want to learn.
7. After stitching through your piece, give it a couple back stitches and tie off your threads inside. Then you’re ready to attach to your belt and get lost!

I discovered Wood&Faulk and was drawn in by its openness, commentary and of course really nice looking products and diys. It’s a very personal website that kinda nails everything, always looking forward to seeing what’s next.
Great to see Matt getting some exposure like this.
I adore everything Matt makes! He’s brilliant. Good work!
Beautiful pictures!